
What is Vertex Painting?
Vertex Painting is a process used in order to paint texture maps onto vertices. It is a useful setup to have when you need variation in your environment. It breaks up the continuity you may have when doing repeatable textures, such as a brick wall.
It does this without needing extra work creating a bunch of individual texture maps that are unique and different. Instead, you are the one using vertices to paint on a texture, almost like adding a new Photoshop layer, right in engine!
The setup is rather simple to pull off for a basic Vertex Paint material. I will break it down into sizeable steps to follow in order to create your own.
Step 1
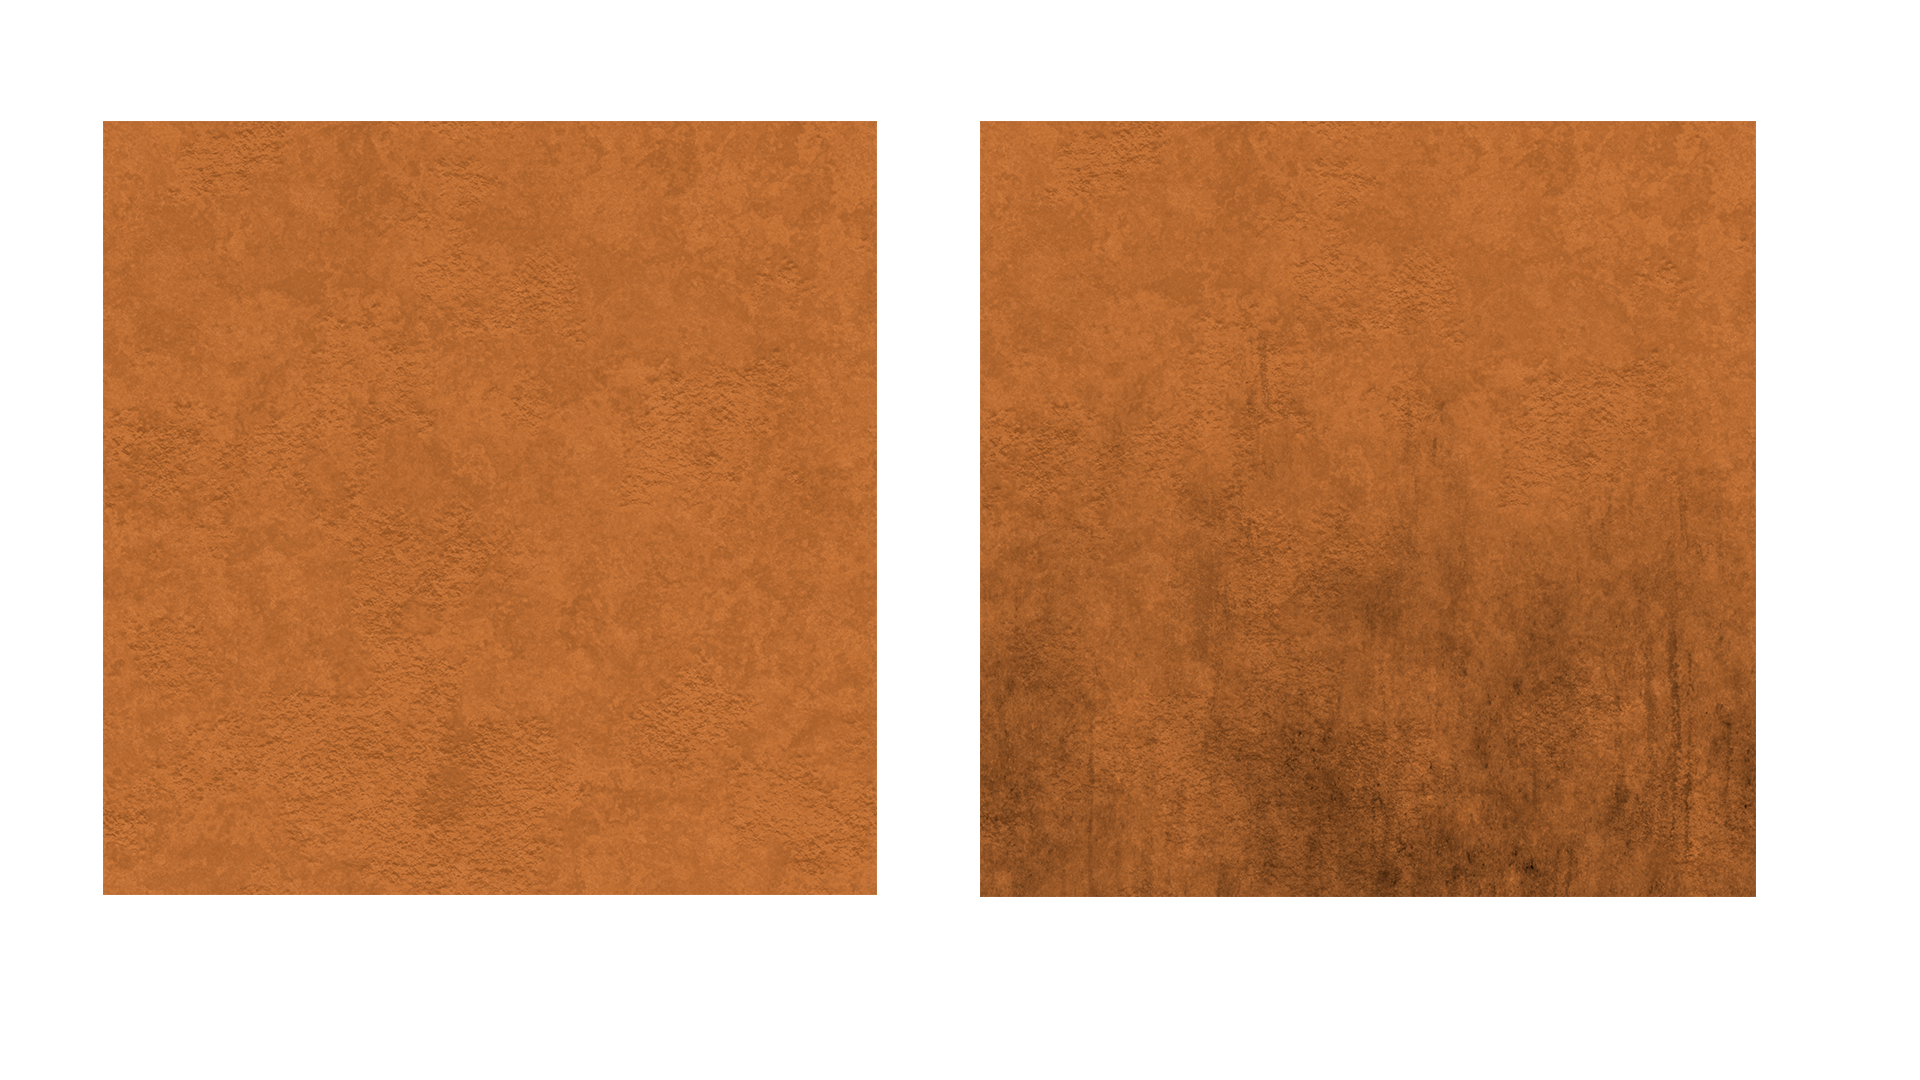
You need at least two types of textures! One should be the "base" texture and the other should be the "modified" texture. For my example, I used one 'clean' wall and one 'dirty' wall as shown below. The only difference between the two is one has dirt I want to paint onto the mesh vertex, and the other one does not.
Step 2
After your textures are properly imported into unreal engine, it is time to make the material with the Vertex color information. Fortunately, Unreal Engine makes it really easy to set up.
1. Create a new material
2. Create a Lerp (LinearInterpolate) node.
3. Add a vertex color node
4. Plug the dirty texture that you want to paint into the 'A' slot of the Lerp node, the clean texture into the 'B' slot of the lerp node, and then the vertex color node into the 'Alpha' slot of the Lerp node. Plug the lerp node into the Base color node. Your setup should look something like so:

Step 3
With that setup established, you are ready to start painting. Save your material and exit back to the viewport. In order to do Vertex Painting, Unreal has a feature called 'Mesh Paint Mode.' Switching Modes can be done on the top left of the viewport:


